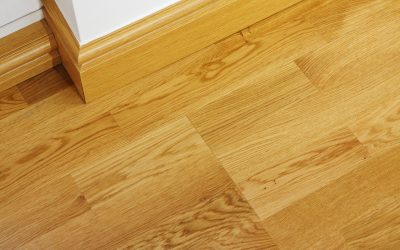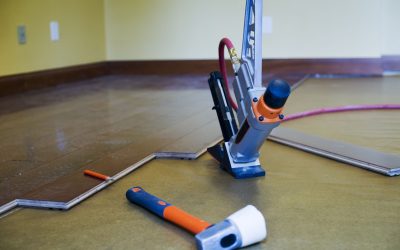
Flooring is installed around curved walls and irregular angles by creating an accurate template, transferring the room’s shape to the material, and making controlled cuts that preserve required perimeter spacing. The process also requires careful layout planning so narrow pieces, uneven seams, and highly visible gaps are not concentrated along the room’s most noticeable edges.
These challenges are common in homes with rounded entryways, bay windows, angled fireplaces, curved staircases, decorative columns, or additions that do not meet the original structure at a standard 90-degree angle. A successful result depends on measuring the actual space rather than assuming the walls are straight or square.
Why Do Curved Walls Require a Different Installation Approach?
Straight walls allow installers to take measurements from consistent reference points. A curved wall changes direction continuously, so one measurement cannot describe the complete perimeter.
Attempting to estimate the curve may result in excessive gaps, material waste, or pieces that do not fit. Installers usually record the shape at several closely spaced points or create a physical template that follows the wall’s contour.
The final cut must reproduce the curve while still allowing any expansion clearance required by the product manufacturer. This clearance is typically concealed beneath baseboards, shoe molding, or another approved finishing component.
The goal is not necessarily to cut the material tightly against the wall. The objective is to create a consistent perimeter that accommodates product movement and can be covered cleanly by the selected trim.
How Are Irregular Room Angles Measured?
Rooms that appear rectangular are not always perfectly square. One corner may be wider or narrower than 90 degrees, or opposing walls may gradually move closer together.
A floor installation contractor can establish a reference line rather than relying entirely on the walls. This line helps guide the direction of planks, tiles, or other materials and prevents the overall layout from drifting with an uneven perimeter.
Measurements may be taken from the reference line to several points along each wall. The contractor can then compare those dimensions and identify where the room changes direction.
Angle finders, straightedges, measuring tapes, laser tools, and templates may all support the process. The appropriate tools depend on the room shape and selected product.
What Is Scribing, and When Is It Used?
Scribing is a method of transferring an irregular contour onto a piece of material. The installer positions the piece near the wall, then uses a compass or similar tool to trace the wall’s shape onto its surface.
The marked piece is removed and cut along the traced line. It can then be returned to the perimeter and checked for fit.
Scribing is particularly useful around:
- Curved walls
- Stone fireplaces
- Rounded stair components
- Uneven masonry
- Decorative columns
- Angled doorways
- Built-in cabinets
- Irregular architectural details
The process may require several small adjustments. Removing too much material at once can create a visible gap, so installers generally make controlled cuts and test the fit before completing the edge.
How Is a Template Created for Complex Curves?
A template reproduces the shape of the installation area before the finished material is cut. It may be made from paper, cardboard, thin template material, or connected strips.
The installer places the template against the curved or irregular boundary and marks the exact contour. Once the shape is confirmed, it is transferred to the flooring product.
Templates are valuable when dealing with broad curves, multiple direction changes, or expensive materials. They allow the installer to check the shape before making a permanent cut.
For particularly complicated areas, the template should also identify orientation. Without a clear directional mark, a correctly shaped piece could still be reversed or transferred to the wrong side of the material.
How Does Material Type Affect the Cutting Method?
Different materials require different tools and cutting techniques. Luxury vinyl and some laminate products may be shaped with cutting tools appropriate to their composition. Wood products may require a jigsaw, coping saw, or another saw selected for the cut.
Tile presents a different challenge because curved shapes cannot always be created with a standard straight tile cutter. The installer may need a wet saw, diamond blade, nippers, or specialized cutting equipment. Sharp internal corners should also be approached carefully because they may concentrate stress.
Each product has limits regarding minimum piece size, edge support, and acceptable cutting methods. Manufacturer instructions should guide the process so the cut does not interfere with the material’s performance.
Homeowners planning flooring installation in Surprise should make sure these architectural details are identified before material quantities and project timelines are finalized.
How Is the Main Layout Kept Visually Balanced?
Curved walls and unusual angles can affect the appearance of the entire room, not only the perimeter. If installation begins from an uneven wall, every following row may reflect that misalignment.
A flooring contractor may first evaluate the room’s primary sightlines, entrances, longest walls, and adjoining spaces. The layout can then be centered or adjusted to avoid narrow pieces in prominent areas.
For plank materials, the team must consider row width and end-joint placement. For tile, they must review grout-line alignment and the size of perimeter cuts. A balanced design may require shifting the starting line slightly before installation begins.
Dry-fitting several rows can reveal potential problems before adhesive, mortar, or locking components make changes more difficult.
How Are Expansion Gaps and Trim Handled?
Many flooring products require space around fixed boundaries so they can respond to temperature and humidity changes. Curved walls do not eliminate this requirement.
The expansion space should follow the shape of the wall and remain within the manufacturer’s specified range. It can then be covered with flexible trim, segmented molding, shoe molding, or a custom finishing solution appropriate to the room.
Standard rigid baseboards may not bend around a tight curve. Depending on the design, installers may use flexible molding, carefully joined sections, or custom-made trim.
The trim should conceal the clearance without pressing down so firmly that it restricts product movement.
What Should Be Reviewed Before Installation Starts?
Before work begins, the room should be inspected for curved edges, non-square corners, columns, fireplace surrounds, built-ins, and angled transitions. Door clearance, adjoining material heights, baseboard plans, and manufacturer requirements should also be reviewed.
Accurate planning helps determine material quantities and reduces unnecessary cutting waste. It also gives the contractor time to select suitable templates, cutting tools, and trim components.
Plan Carefully for Irregular Spaces
Curves and unusual angles can be handled successfully when the installer measures from reliable reference points, creates accurate templates, and follows product-specific requirements.
Before beginning a project in Surprise, AZ, consult a qualified contractor who can evaluate the room geometry, prepare an appropriate layout, and explain how complex edges will be cut and finished.